The next and final step in the pool process is the plaster and pool cover, however, the plaster is very delicate and we didn’t want to run the risk of the plaster or pool cover being damaged while the rest of the yard is being built. The plaster and pool cover are a very expensive portion of the pool and no one wanted to be responsible for replacing it, if broken.
We decided to take a few weeks to complete the area surrounding the pool before returning to do the plaster and pool cover. A few weeks actually turned into about a month, as there were a few delays such as rain. Rain! Again! In August and September! Things also just took a little longer than expected which is to be expected during construction.
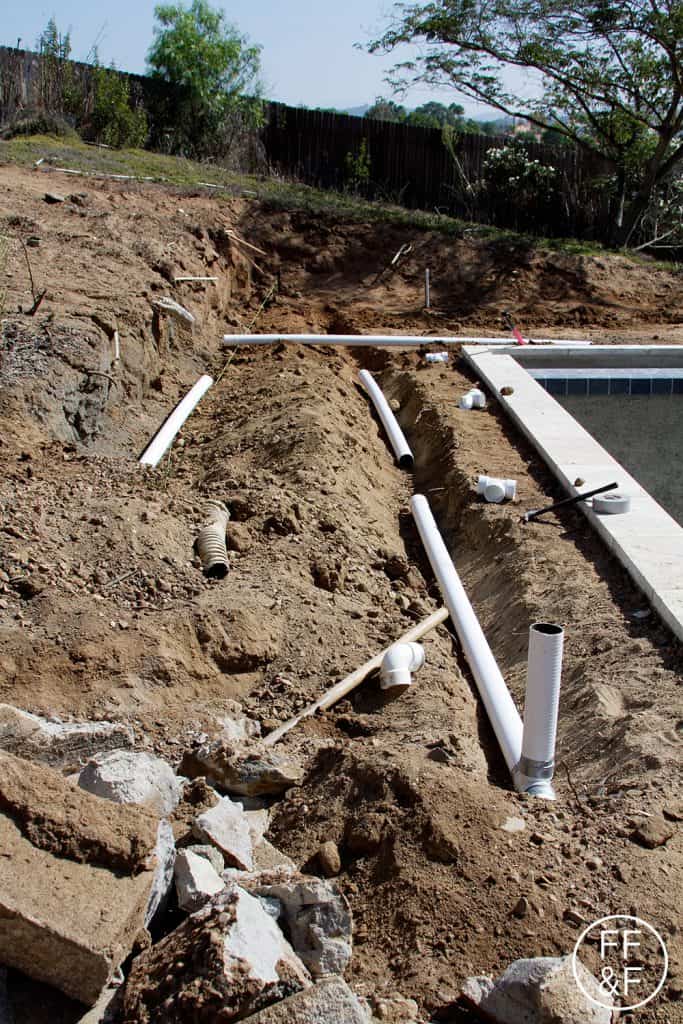
Since we tore up almost the entire backyard with a bulldozer, all the existing drainage and irrigation systems were destroyed. They usually sit only a few inches below the ground so there was no saving it.

Putting in the drainage lines was a labor-intensive process. They laid pipe throughout the entire backyard and led it directly to the street. It’s slow and boring to watch but totally necessary. It keeps your yard from flooding or from floating away.
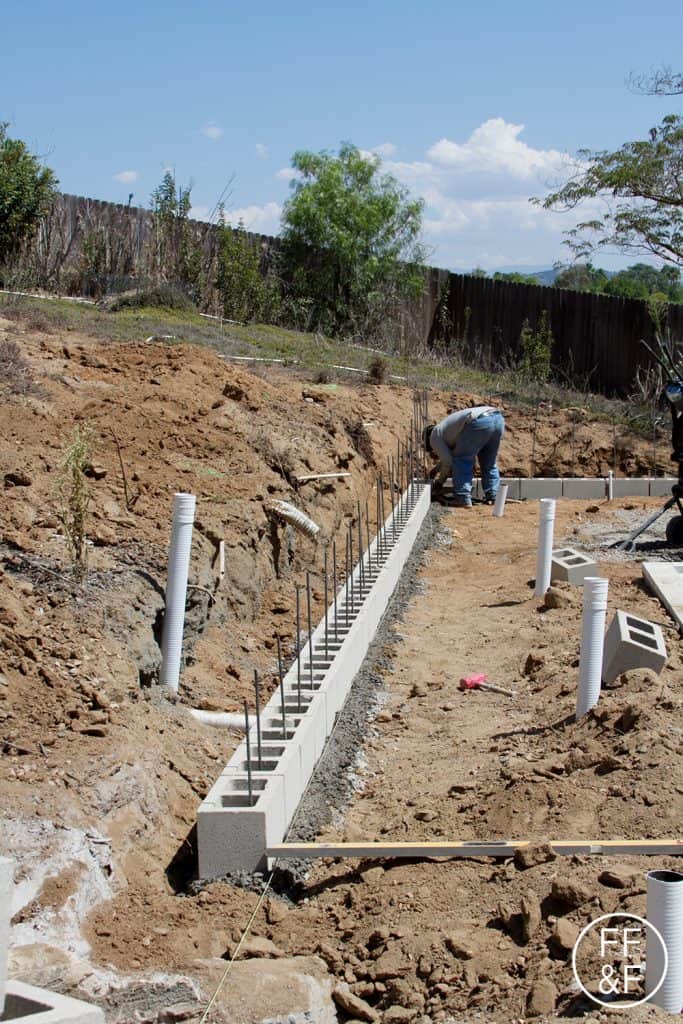
After the drainage was done, we were able to really start moving along and starting seeing progress. Since our yard was on a slope, we had to cut into the land to create a flat space for the pool. We also created another flat area on the hill to create some more usable space. This meant that we needed retaining walls. I’ve mentioned this before, but we love the modern look of concrete. We would have loved concrete walls but doing poured concrete is expensive. It’s shockingly more expensive than stucco. We decided to go with stucco because of the price but also because our house and other existing retaining walls are all made out of stucco. A concrete wall would have really stood out.
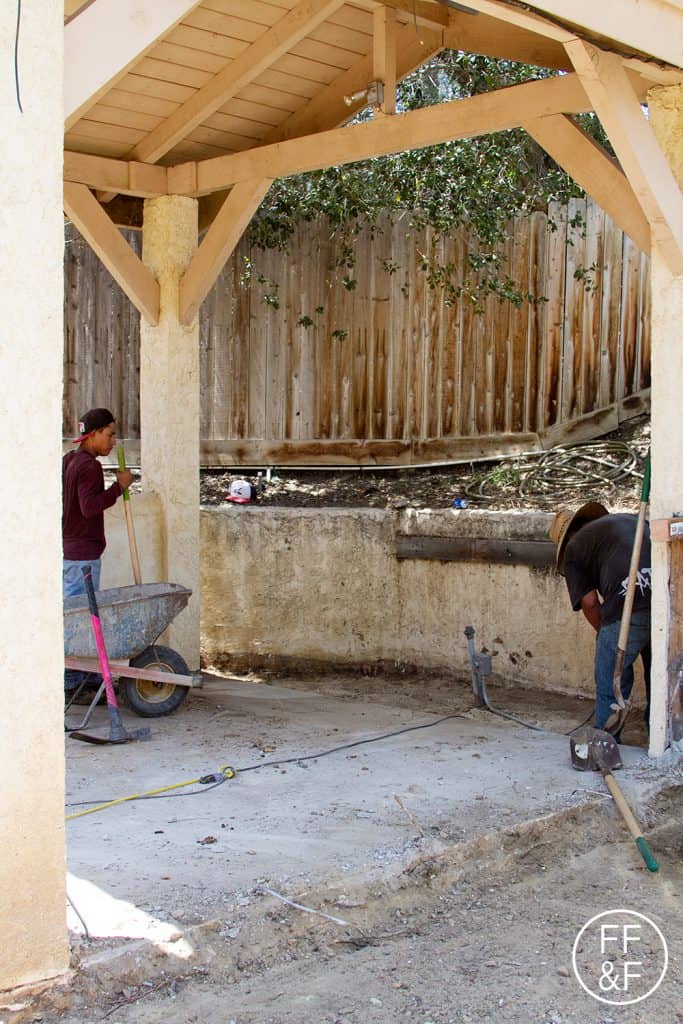
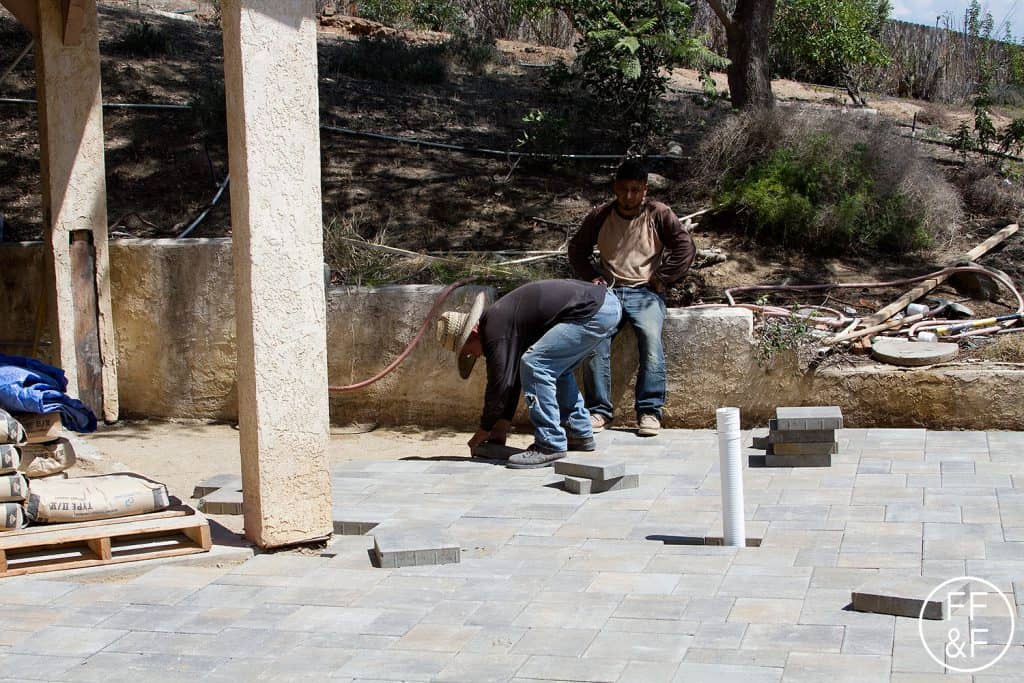
We have existing concrete under our covered patio and under what will be our BBQ area. We wanted to continue the concrete and extend our ‘living space’ but again, concrete is expensive. Again, we were shocked to find out that pavers were less expensive than concrete. We decided to go with the pavers due to price but also because we weren’t sure if we could get the existing concrete to blend with the new concrete. The old concrete has been there for over 30 years and the new concrete just wouldn’t look the same. At least the pavers will compliment the concrete.
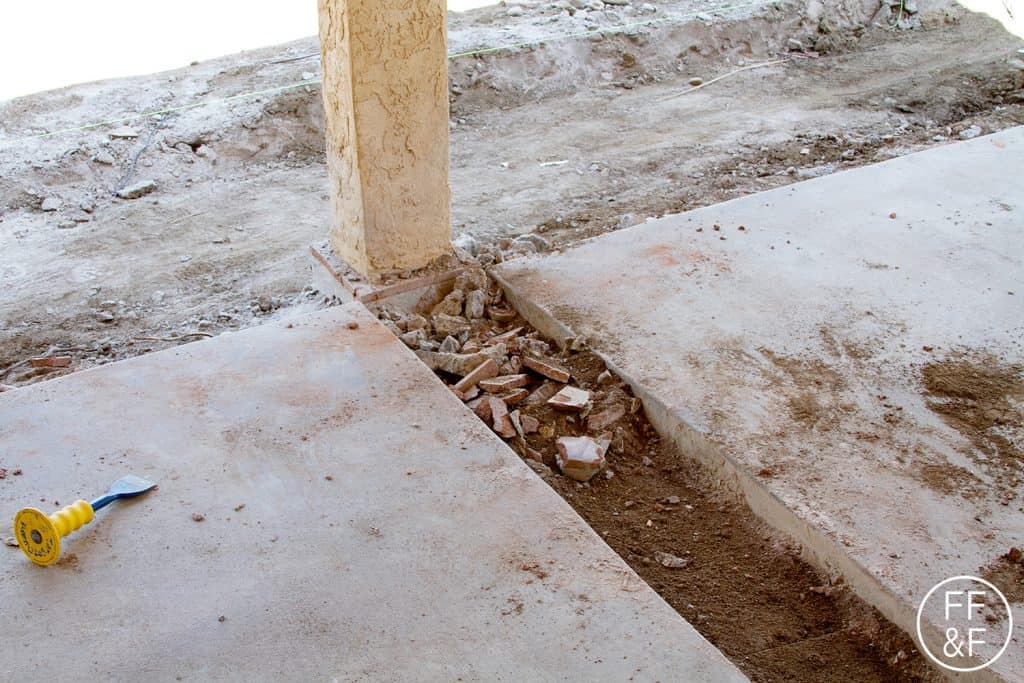
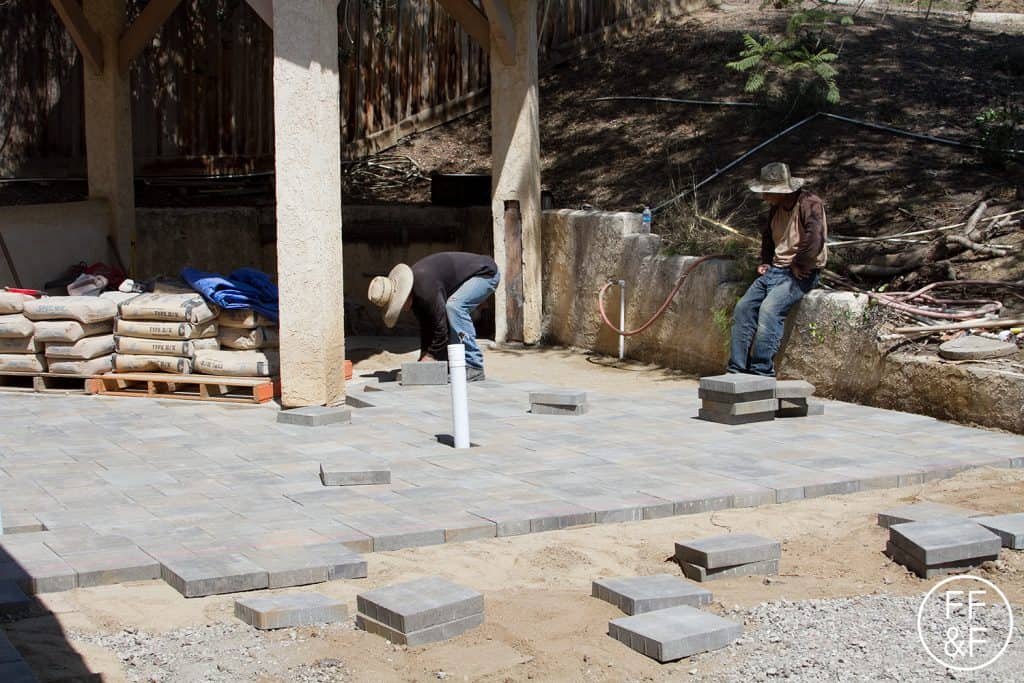
It was very exciting to get rid of the old, red, Spanish tile that was under the covered patio and replace it with pavers. It’s a much cleaner look. We also got rid of a huge palm tree that was right next to the house that reached out and blocked your path. It took up about a quarter of the patio area. We’ve seen too many black widows, rats, and rattlesnakes so the palm tree had to go. We thought it was best to just get keep vegetation away from the house to deter these animals and insects from getting into our house. We filled in the spot where the palm tree was with pavers. The area looks so much bigger now. It’s going to be a great space for entertaining.
The very last part of the lower area that needed to be done before we could finish the pool was the artificial turf. I discussed the decision-making process regarding artificial turf (versus real grass) during the Design Decisions and the Plan.
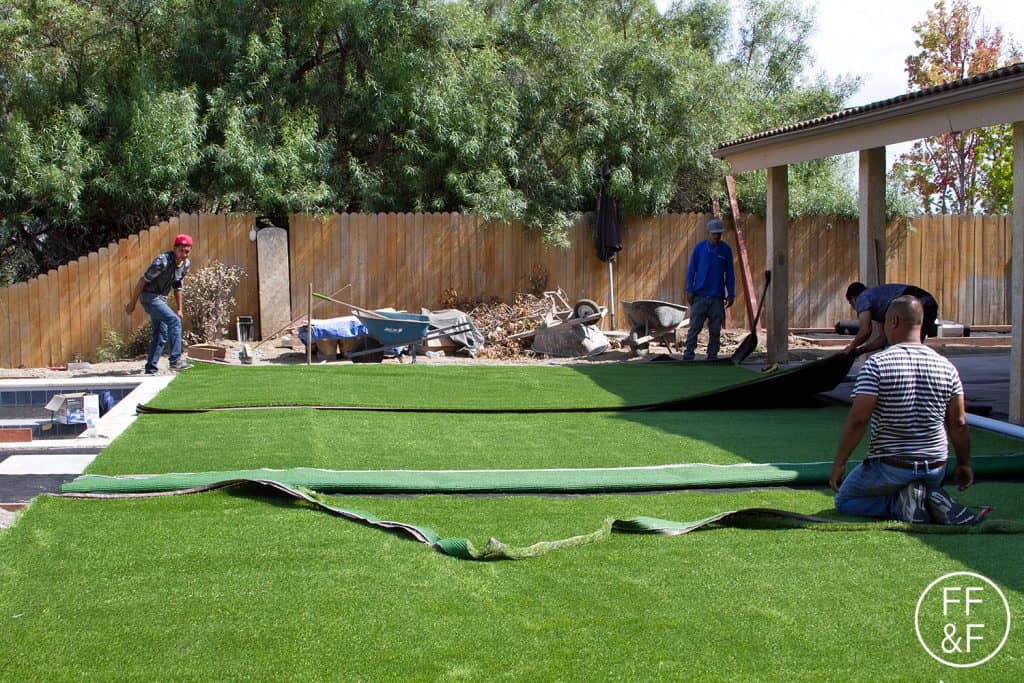
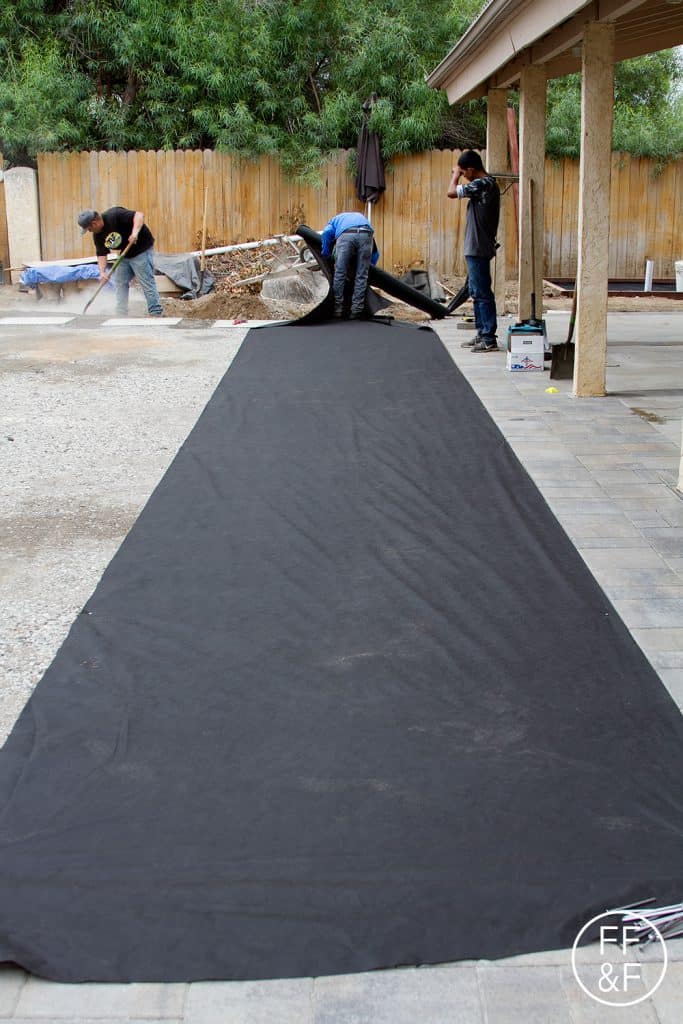
We wanted stepping stones to break up the grass. The turf was placed after the stepping-stones. They rolled it out like carpet. They rolled it out over the entire area and then cut out the stepping-stones. They also placed a protective covering underneath the turf to prevent weeds from popping up. They also added sand and other things on top of the turf to weight it down. To clean the turf, you just need to keep food and other organic material off it. You can just spray it down with the hose.
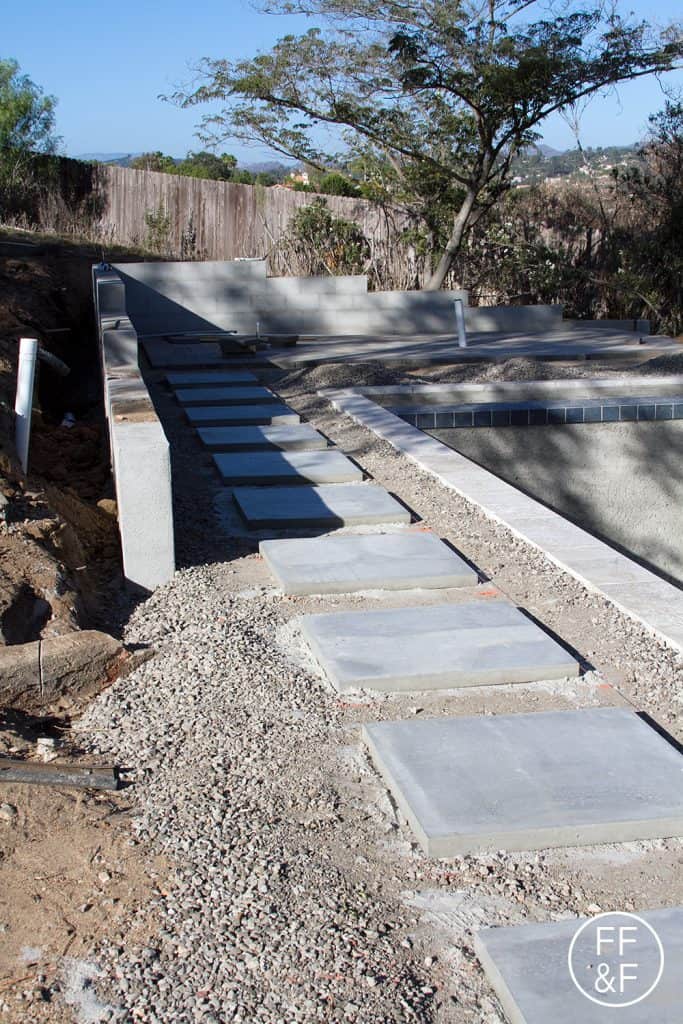
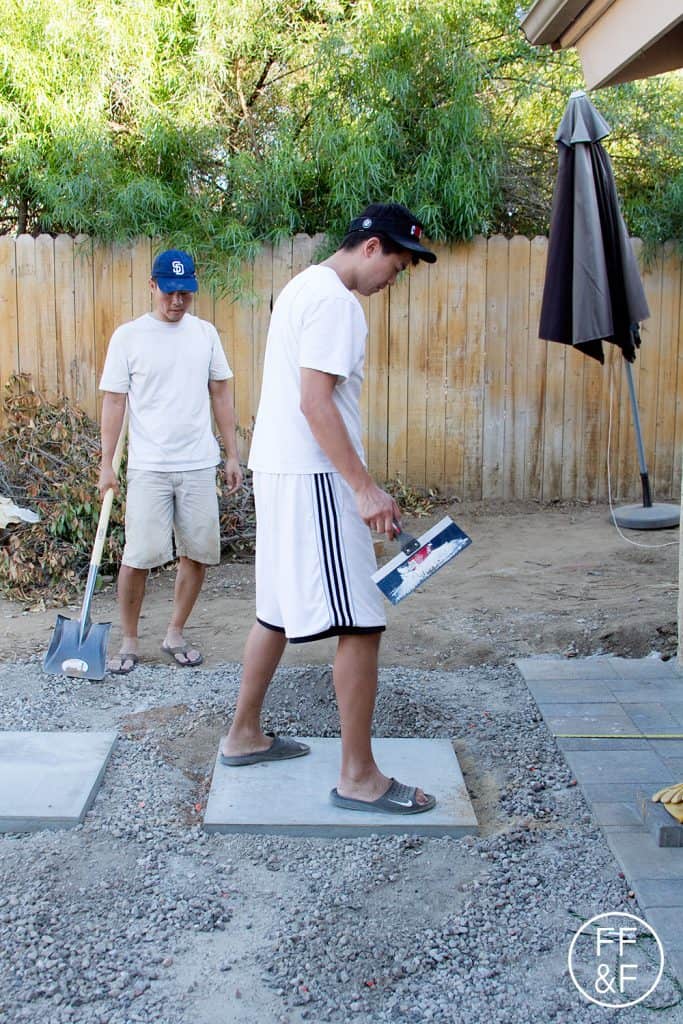
We chose these amazing 30” hand troweled concrete stepping-stones. It coordinated with the existing concrete and looks amazing. To save a few bucks we spend one weekend placing the stones. There are 24 stones and each weighted about 100 pounds so we convinced a few of our friends to help out. It took 3 guys about 8 hours to set all the stones in place. Since our yard is based on straight and symmetrical lines, it was really important that they were placed in exactly the right position. If it was lopsided or off center then it would have ruined the look. We needed to be meticulous which would difficult when it’s 100 degrees outside and you’re trying to lift concrete all day. The boys did an amazing job and received compliments from the construction crew. They were impressed.
Stay tuned for the next step in our renovation, which is Built-In BBQ Area, Cabanas and Raised Garden Beds! In the meantime, be sure to follow along the renovation on instagram using the hashtag #BethHomeProject.
If you missed my last post, check out Front and Backyard Renovation: Pool Tile and Coping.
Hi,
What color/ company are the pavers you used?
We used Panjia Landscaping as our contractor. I have no idea where he got the pavers. He brought them to our house and we picked from the samples he provided.
I think it would be nice to have a retaining wall for the back of the house. We have dirt that is sliding down from the slope and I am thinking a retaining wall is almost required. It won't be a huge deal because it just needs to be installed to keep all the dirt from sliding down.
Retaining walls are great when you have a sloped yard.
I always love using artificial turf for my projects in Pennsylvania. My clients always have odd requests but I mention the number one thing I am looking at when I am here for my initial estimate is drainage and how we can accomplish just that. Nothing like a beautiful landscaping around the pool! Thanks for sharing your knowledge and experience.
We found out during the last rain that drainage is super important.
I think it is important to have the drainage for those retaining walls. They are going to need it if you want to effectively keep the land from sliding over the wall. Does the water ever put a lot of pressure on the retaining walls?
It is! That's why we have drains in the artificial turf as well as behind the retaining walls. You just can't see them in the photos. You'll be able to see the finished retaining walls in the backyard reveal which is coming up.
As we live in San Diego we don't get large amounts rain. The drains and walls don't have any problems during a typical rain. However, we got an unusual amount of rain after the landscaping was finished and ending up adding a few larger drains in the lower steps so that the water is sure to drain quickly. We will be adding more plants to the hill to keep the dirt from eroding.